Most home “vanilla lattes” fail for one reason: the coffee is too weak for the amount of milk. You end up drinking sweet, warm milk with a coffee aftertaste.
The second reason is technique. People add vanilla extract straight into hot coffee (it tastes “chemical”), froth milk until it’s bubbly (not micro-foam), and assemble drinks in an order that breaks the flavor (syrup floats, coffee tastes sharp, milk tastes flat).
This guide fixes all of that with barista-level science without requiring an espresso machine. You’ll learn the same fundamentals that make a latte taste like a café drink, plus the exact “Starbucks-style” vanilla sweetness (but cleaner and better balanced).
Your “Better than Starbucks” angle isn’t about snobbery. It’s control:
Stronger coffee base so the drink doesn’t taste weak.
Emulsification so vanilla integrates into crema and aroma instead of staying sugary at the bottom.
Correct milk thermodynamics so your milk tastes naturally sweet and the foam is silky—not dry and airy.
Let’s build a latte that actually hits.
The 3 Pillars of a Perfect Latte: Base, Emulsion, and Texture
If you want the quick barista answer for how to make a vanilla latte at home, it’s this:
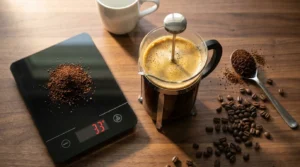
- Base (Strength): Use espresso, or a concentrated coffee brewed at 1:8 coffee-to-water ratio so it can cut through milk.
- Emulsion (Integration): Pull or pour the hot coffee directly over vanilla simple syrup so heat melts sugars and binds them to crema before milk is added.
- Texture (Milk): Heat milk to 140°F–155°F (60°C–68°C), then create dense micro-foam (tiny bubbles) so the drink feels creamy and tastes sweeter.
Most “homemade vanilla latte” recipes ignore at least one pillar. If any pillar collapses, the latte tastes thin, harsh, separated, or overly milky.
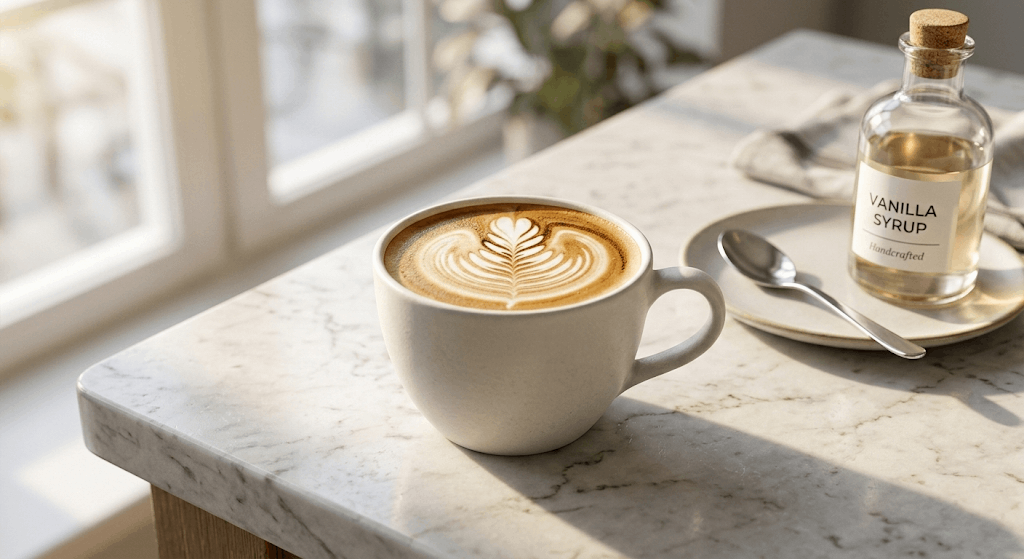
Ingredients: Building Your Vanilla Latte
A vanilla latte is simple on paper: coffee + vanilla + milk. In reality, the *form* of vanilla and the *strength* of coffee decide whether it tastes professional.
You need:
Coffee: espresso or concentrated brew (details below)
Vanilla simple syrup: not straight extract
Milk: dairy or barista oat milk (or other alternatives)
Optional: pinch of salt (yes, really), for sweetness perception
Why You Can’t Just Use Vanilla Extract
Vanilla extract is not “vanilla flavoring.” It’s a solution of vanilla compounds dissolved in alcohol, typically 35%+ alcohol by volume. That alcohol is useful in baking because it evaporates in the oven and spreads flavor.
In coffee, it becomes a problem.
Here’s the Alcohol Problem in plain terms:
– Hot coffee volatilizes alcohol fast, but not cleanly.
– When you pour extract directly into hot coffee, the alcohol hits your nose first as a sharp solvent aroma.
– In the cup, alcohol can read as **bitter, chemical, and drying**, especially against coffee acidity.
Also: vanilla flavor compounds are happier in a sugar + water matrix for beverages. Sugar doesn’t just sweeten; it carries aroma and rounds bitterness.
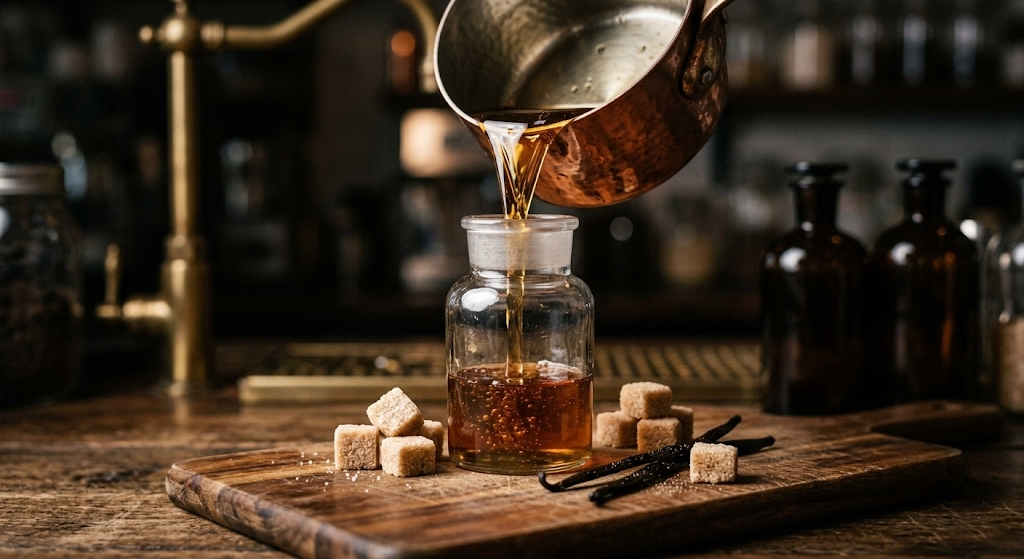
So the barista solution is: turn the extract into vanilla simple syrup. Now the vanilla is stable, evenly dosed, and integrates properly with espresso.
Quick Homemade Vanilla Simple Syrup Recipe (1:1 sugar to water + vanilla extract)
This is your vanilla syrup recipe for coffee that behaves like a café syrup clean, strong, and easy to measure.
Base ratio: 1:1 sugar to water (by volume)
Ingredients
– 1 cup sugar (white sugar for classic café flavor)
– 1 cup water
– 1 to 1½ tablespoons vanilla extract (adjust to taste)
– Optional: tiny pinch of salt (improves perceived sweetness)
Method (5 minutes)
1. Combine sugar + water in a small saucepan.
2. Heat until steaming and the sugar fully dissolves. Do not aggressively boil; you’re dissolving, not reducing.
3. Remove from heat. Let it cool for 2–3 minutes (so you don’t flash off aroma).
4. Stir in vanilla extract (and salt if using).
5. Bottle and refrigerate.
Storage: 2–3 weeks refrigerated in a clean jar/bottle.
Why this works: you’ve created a stable syrup where vanilla compounds disperse evenly, and you’ve eliminated the “raw alcohol spike” that makes vanilla extract taste off in coffee.
The “Barista Pump” Conversion Chart
Cafés dose flavored syrups in “pumps.” At home, you need a consistent conversion so your latte tastes the same every time.
Rule: 1 pump = ½ tablespoon
That means:
2 pumps = 1 tablespoon
4 pumps = 2 tablespoons
6 pumps = 3 tablespoons
Pump math for common cup sizes
Most cafés scale syrup with size. Here’s a simple barista-style baseline you can adjust:
– 12 oz latte: 3 pumps
– 16 oz latte: 4 pumps
– 20 oz latte: 6 pumps
Because 1 pump = ½ tbsp, the tablespoons are:
| Latte Size | Cafe Pumps | Tablespoons | The Math |
|---|---|---|---|
| 12 oz | 3 pumps | 1.5 tbsp | 3 × 0.5 = 1.5 tbsp |
| 16 oz | 4 pumps | 2 tbsp | 4 × 0.5 = 2 tbsp |
| 20 oz | 6 pumps | 3 tbsp | 6 × 0.5 = 3 tbsp |
Pro calibration tip: If you want “how to make a vanilla latte Starbucks” sweet, start at the table amounts, then increase by **½ pump (¼ tbsp)** increments until it matches your memory.
Equipment: No Espresso Machine? No Problem
An espresso machine is the fastest path to café flavor—but you can absolutely make a proper vanilla latte without one.
The non-negotiable is strength. Standard drip coffee is too dilute; when you add 6–10 oz of milk, it disappears.
Coffee-to-Water Ratio (the fix)
If you don’t have espresso, brew coffee concentrate at 1:8 coffee-to-water ratio.
That means:
1 gram coffee : 8 grams water
Or roughly: **2 tablespoons coffee : 4 oz water** (approximate; grams are more accurate)
Why 1:8 works:
– Milk contains fat and proteins that mute flavor and smooth acidity.
– To taste “coffee-forward” in milk, the coffee must be concentrated enough to survive dilution.
Best methods for a 1:8 latte base
Option 1: Moka pot (stovetop “espresso-like”)
– Strong, syrupy coffee with natural intensity.
– Great for hot lattes.
Option 2: AeroPress (most controllable)
– Easy to hit 1:8 precisely.
– Clean, strong concentrate that’s excellent for iced lattes too.
Option 3: Strong instant espresso (emergency option)
– Works in a pinch, but choose a quality brand and use less water.
– Still follow the syrup/emulsion and milk texture rules.
(Scales are the cheapest upgrade that makes your drink taste “repeatable.”)
The Secret to Cafe-Quality Milk Texture (Micro-foam)
A latte is not “coffee with milk.” A latte is coffee + micro-foamed milk**.
Micro-foam is made of tiny, uniform bubbles suspended in milk. It creates:
– A thicker, creamier mouthfeel
– Better sweetness perception
– A cohesive drink (not separated layers)
The milk has to be treated correctly *before* you foam it.
The Golden Temperature Window (140°F – 155°F)
Milk sweetness is real and it’s chemistry.
Heat milk to 140°F–155°F (60°C–68°C).
– In this range, milk tastes naturally sweeter because warmth increases perceived sweetness and the texture becomes silkier.
– Go above 160°F (71°C) and you start damaging the proteins and changing how lactose presents.
**Thermodynamics rule: Heating over 160°F can scald milk, flatten its natural sweetness, and ruin micro-foam structure (foam becomes dry, stiff, and collapses weirdly).
Barista standard target: 150°F (65°C).
Tools:
– Best: thermometer
– Acceptable: “too hot to hold the pitcher more than 2 seconds” (less accurate)
Method 1: The French Press Hack (Explain the plunge technique for dense micro-foam)
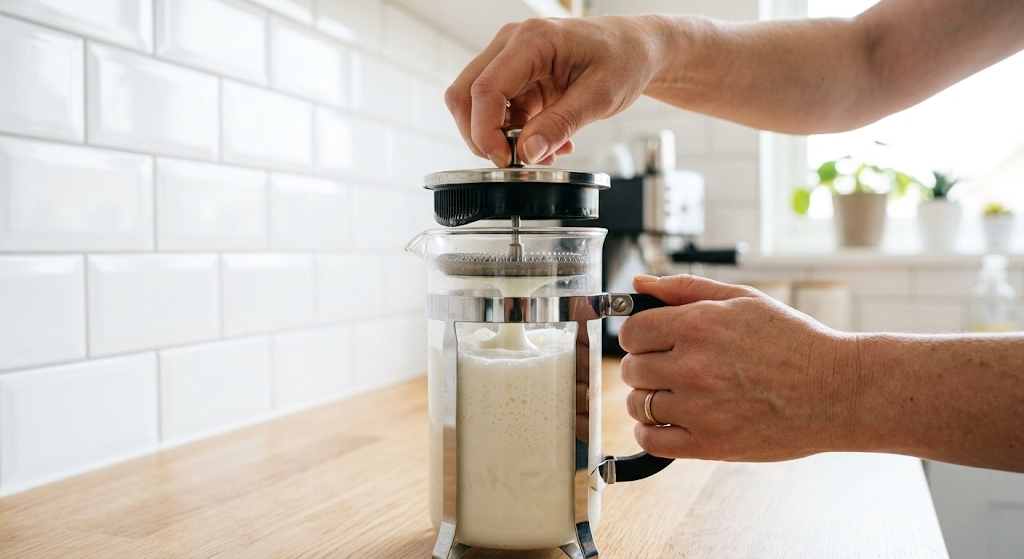
This is the best no-steam-wand method for true latte-like texture.
What you need
– French press (any size)
– Milk warmed to 140°F–155°F
Technique (micro-foam, not bubbles)
1. Heat milk to 150°F (65°C) in a microwave or saucepan.
2. Pour into French press (don’t fill more than halfway).
3. Plunge rapidly for 10–20 seconds with short strokes (about 1–2 inches of travel).
4. Tap the press gently on the counter, then swirl the milk to polish the foam.
Why this works: plunging shears air into milk in small amounts and disperses it evenly—creating tighter bubbles than shaking or whisking.
Common mistake: plunging slowly and deeply. That makes big bubbles (cappuccino foam, not latte micro-foam).
Method 2: The Handheld Frother
Handheld frothers can make good foam, but technique matters.
Steps
1. Heat milk to 140°F–155°F.
2. Tilt your cup slightly and place the frother just below the surface.
3. Froth 5–10 seconds to inject a little air.
4. Submerge the frother deeper and continue 10–15 seconds to break bubbles smaller.
5. Tap and swirl to smooth.
If your foam looks like dish soap bubbles, you’re adding too much air. Latte foam should look like wet paint.
Step-by-Step: How to Make a Hot Vanilla Latte
This is the core method. If you follow the assembly order, you get café-level flavor integration and texture.
The direct-pull emulsification method (non-negotiable)
The Emulsification Protocol: Pull hot espresso directly over the syrup. The heat melts complex sugars and encourages binding with crema before milk enters the drink. This is how you prevent “sugar at the bottom” and get a unified vanilla-caramel aroma throughout the cup.
Hot Vanilla Latte (12–16 oz) — numbered steps
1. Add syrup first.
Put 1.5–2 tbsp vanilla simple syrup into your mug (see pump chart).
2. Brew your coffee base.
– Espresso: 1–2 shots (about 30–60 ml).
– No machine: brew a concentrate at 1:8 ratio (aim for **2–4 oz** strong coffee).
3. Pour/pull hot coffee directly onto syrup.
This is the emulsification step. Stir for 5 seconds.
4. Heat milk to the golden window.
Bring milk to **140°F–155°F (60°C–68°C)**. Target **150°F (65°C)**.
5. Create micro-foam.
– French press: 10–20 seconds fast plunges.
– Frother: surface aeration 5–10 seconds, then refine 10–15 seconds.
6. Combine: coffee base first, then milk.
Pour milk steadily into the coffee-syrup base, holding back foam with a spoon if needed.
7. Finish with micro-foam.
Spoon a small cap of foam on top and swirl the cup gently.
Flavor tuning (no fluff, just control):
– Too sweet? Reduce syrup by ½ tbsp.
– Not vanilla-forward enough? Increase syrup by ¼ tbsp, not a random splash.
– Bitter? Your coffee is under-extracted or too weak; fix the brew ratio before adding more syrup.
Step-by-Step: How to Make an Iced Vanilla Latte (Without Watering It Down)
The fastest way to ruin an iced latte is to add hot coffee to a cup full of ice and then “top with milk” using weak coffee. You get thermal shock, instant dilution, and a watery finish.
Your goal: keep the coffee strong and the assembly order correct.
Exact order of assembly
Syrup → Espresso/Concentrate → Ice → Cold Milk
This order matters because:
– Syrup dissolves best in hot coffee.
– Ice should chill the coffee after syrup integration.
– Milk last prevents chaotic mixing and dilution pockets.
Iced Vanilla Latte steps
1. Add vanilla simple syrup to your glass.
Use the same dosing as hot: 1.5 tbsp (12 oz), 2 tbsp (16 oz), 3 tbsp (20 oz)*.
2. Add hot espresso or hot 1:8 concentrate.
Stir 10 seconds. You’re fully dissolving syrup into the coffee.
3. Add ice.
Fill the glass about **¾ full**. More ice usually means *less* watering over time because it cools faster.
4. Add cold milk.
Pour milk to volume. Stir briefly.
Pro move: If your ice always melts fast, pre-chill your glass or use larger ice cubes.
This method is the foundation of how to make an iced vanilla latte that stays strong to the last sip.
Dietary Variations: Skinny & Oat Milk Lattes
You can absolutely do a skinny vanilla latte or an oat milk latte but understand what changes scientifically so you can compensate.
Skinny Vanilla Latte (lower sugar / lower fat)
Two levers:
– Reduce sugar (syrup)
– Reduce milk fat (skim milk or low-fat milk)
What to expect:
– Less fat = less perceived richness and sweetness.
– You may need slightly more vanilla aroma or a tiny pinch of salt to compensate.
Options
– Use a sugar-free vanilla syrup (look for sucralose or monk fruit blends that dissolve cleanly).
– Or reduce syrup dose and increase vanilla aroma via a stronger extract amount in your syrup.
[Insert Affiliate Link for Sugar-Free Vanilla Syrup]
Oat Milk Latte (barista edition)
Oat milk can be incredible in lattes—when it’s the right type.
Barista oat milks are formulated to steam and foam better. They often include:
– Added fats (for texture)
– Stabilizers (to reduce separation)
– Sometimes acidity regulators
This matters because oat milk is more prone to:
– Thin foam (big bubbles)
– Separation in acidic coffee
– “Cereal” flavor dominance if coffee is too weak
Best practice:
– Choose a barista blend.
– Keep your coffee base strong (again: espresso or 1:8).
Barista Troubleshooting Guide
This section solves the two problems that make people quit: curdling and weakness.
Why is My Milk Curdling?
Curdling is usually protein separation triggered by a clash of temperature + acidity.
The classic home mistake: hot coffee (acidic) + cold milk. The cold milk proteins hit a hot acidic environment and can separate especially with certain non-dairy milks.
How to prevent it:
– Avoid thermal shock. Don’t pour fridge-cold milk into very hot coffee.
– Warm the milk slightly (even to **100°F / 38°C**) before combining if curdling is common.
– Use the correct assembly: syrup + coffee first, then milk.
– For oat/almond: choose barista versions with stabilizers.
If it still curdles:
– Your coffee may be extremely acidic (light roast, under-extracted).
– Fix extraction: grind finer (if applicable), increase brew time, or slightly lower brew ratio strength.
Why Does My Latte Taste Weak?
This is almost always a base-strength issue, not a syrup issue.
Checklist:
– If you’re using drip coffee: it’s too dilute for a latte.
– Fix: use espresso, or brew concentrate at 1:8 coffee-to-water ratio.
– Use enough coffee volume: aim for 2–4 oz concentrate for a 12–16 oz latte.
Also consider:
– Too much milk. A latte is mostly milk, but if your base is weak, milk will dominate.
– Too much foam (dry foam tastes like air, not milk). Micro-foam should be dense and glossy.
Frequently Asked Questions (FAQs)
Yes. but not standard drip strength if you want café flavor. For a true homemade vanilla latte, use: Espresso, or – A concentrated brew at 1:8 coffee-to-water ratio (AeroPress or moka pot) That strength is what keeps the latte from tasting like vanilla milk.
Use a barista-formulated non-dairy milk, especially for oat milk latte results:
– Barista oat milk is the most latte-like.
– Almond milk can work but is more prone to separation and thin foam.
Keep the coffee strong and avoid pouring ice-cold milk into very hot coffee to reduce curdling risk.
Yes. A vanilla latte includes added sugar (via vanilla simple syrup) and milk, which amplifies sweetness perception. The sweetness level is adjustable:
Start with 1.5–2 tbsp syrup for 12–16 oz.
Adjust in ¼ tbsp increments for precision.
Your “Cafe-Quality” Checklist (Save This)
If you only remember five rules for how to make a vanilla latte at home*, make them these:
– Brew espresso or **1:8** coffee concentrate (drip is too weak).
– Use **vanilla simple syrup**, not straight vanilla extract (the Alcohol Problem is real).
– Pour hot coffee **directly over syrup** and stir (Emulsification Protocol).
– Heat milk to **140°F–155°F** (target **150°F**)—never past **160°F**.
– Create dense micro-foam (French press or frother), then assemble coffee → milk → foam.
Do this, and your latte won’t taste like watered-down milk. It will taste like a café drink—only you control the strength, sweetness, and texture every single time.