
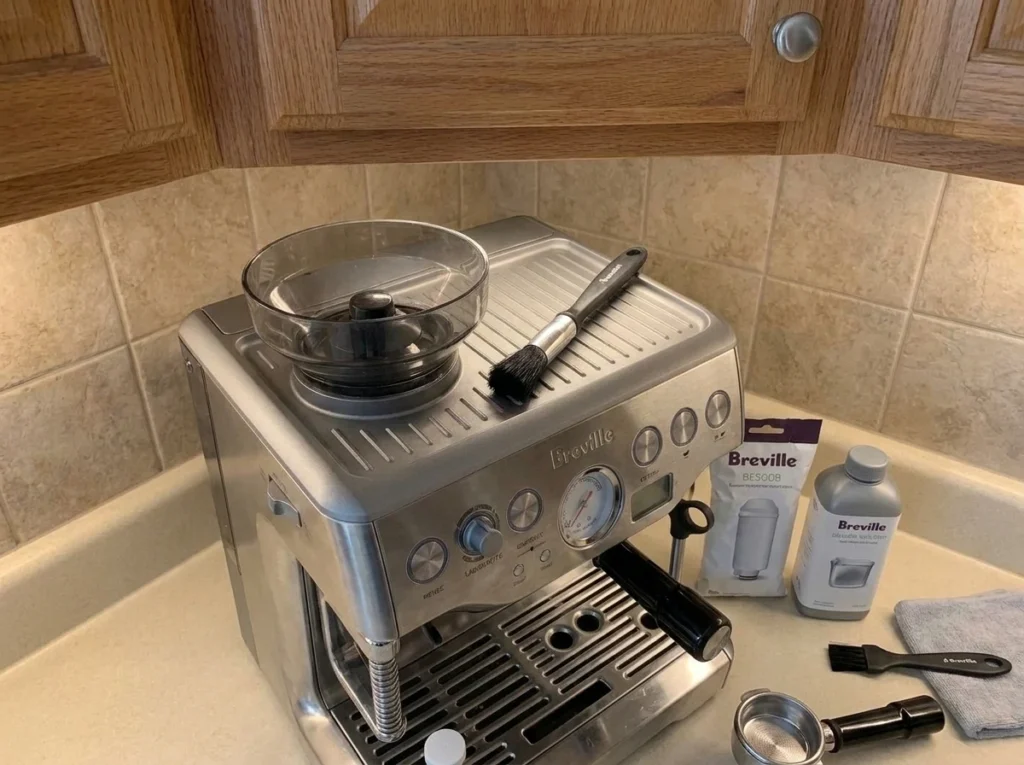
If your dose is drifting, grinding has slowed, or the grinder sounds different, residue around the burrs or chute may be contributing to the problem. Learning to clean the Barista Express Impress grinder keeps the conical burrs cutting cleanly, which helps keep your espresso consistent. Unlike the brew side, the grinder has no maintenance light—there is no flashing reminder—so this one is on you to do by feel and by signs.
There are two levels to it: a quick brush-out of the burrs that most owners should do regularly, and a deeper strip-down you only need when the grinder is actually clogged. This guide covers both for the BES876 specifically, plus the daily purge that keeps grinds fresh and the common faults that look like a broken grinder but are just maintenance. The brew side is a separate job—if you also need to handle scale and coffee oils, see our guide to clean and descale the Barista Express Impress.
Still deciding on the machine, or want the full picture? Our Breville Barista Express Impress review covers how the built-in grinder performs day to day.
Quick Answer
To clean the grinder, empty and run out the beans, then remove the hopper and the top burr and brush both burrs and the grinds chute with the supplied brush—no water, no dishwasher, and mind the edges because the burrs are sharp. That brush-out is all most people ever need. Only if the grinder is clogged do you do the advanced clean, which uses a 10 mm socket and long-nose pliers to remove the lower burr and clear the outlet. Purge the grinder before your first shot each day.
| Routine clean | Advanced clean | |
| What it does | Brushes residue off the burrs and chute | Clears a blockage at the grinder outlet |
| Tools | Supplied cleaning brush only | 10 mm socket, long-nose pliers, brush/pipe cleaner |
| Take the lower burr out? | No | Yes |
| When | Regularly / when grinding slows or clumps | Only when the grinder is clogged |
| How we verified this guide We checked every step, tool, and grind-size setting against Breville’s current BES876 instruction manual and official grinder-cleaning tutorial for the Barista Express Impress. Last verified September 2026. | ||
We verified the procedure against Breville’s current BES876 instruction manual and official grinder-cleaning tutorial.
Cleaning vs Adjusting the Burrs
Two different jobs get confused here. Cleaning removes coffee residue so the burrs cut consistently. Adjusting the upper burr changes the grind range (how fine or coarse the grinder can go) and is only for dialing in tricky beans—it is not part of routine cleaning. This guide is about cleaning; leave the burr’s adjustment number where it is unless you are deliberately extending the range.
Before You Start
| Switch off and unplug first Switch off and unplug the machine before cleaning. You will briefly operate the grinder to clear the remaining beans. As soon as the grinder is empty, press POWER to switch the machine off and unplug it before removing the hopper, top burr, tamp cover or any internal grinder components. Never place your fingers or tools near moving grinder parts. |
What you need
- For a routine clean: the supplied cleaning brush. That’s it.
- For an advanced (clog) clean: a 10 mm socket, long-nose pliers, and the brush or a pipe cleaner.
Two rules that matter
- The burrs are sharp. Handle them by the plastic, not the cutting edges.
- Keep it dry. Brush the burrs clean—do not wash them in water and do not put grinder parts in the dishwasher. Moisture and coffee fines make a paste and can rust the burrs.
The Daily Habit: Purge the Grinder
Before the first coffee of the day, purge the stale grinds left in the burrs and chute so only fresh coffee reaches your cup. Press and hold the DOSE button: grinding starts after about half a second and stops when you release. In auto mode, remove the portafilter afterward, discard that grind, and reinsert the portafilter to return the machine to standby. It takes seconds and does more for taste than most people expect.
How to Clean the Barista Express Impress Grinder Burrs
This is the routine brush-out—no tools beyond the cleaning brush, and nothing that changes your grind setting. Set aside a few minutes.
- Empty the hopper. Unlock and lift off the bean hopper, and tip the beans into a container.
- Run the grinder empty. Refit and lock the hopper, then press DOSE and let the grinder run until it clears the beans left in the burrs.
- Switch off and unplug the machine. Once the grinder has stopped and the remaining beans have cleared, press POWER to switch it off and unplug it. Then unlock and remove the hopper.
- Remove the top burr. Turn it to the unlock position and lift it out by the handle.
- Brush the top burr. Work the coffee residue out of the blades with the cleaning brush.
- Brush the lower burr. Brush the fixed lower burr, still seated in the machine, until it’s clear of grounds.
- Clean the chute. Remove the tamp cover and brush the grinds chute so nothing is caked inside.
- Reassemble. Replace the tamp cover, refit and lock the top burr, then refit and lock the hopper. Add beans and you’re done.
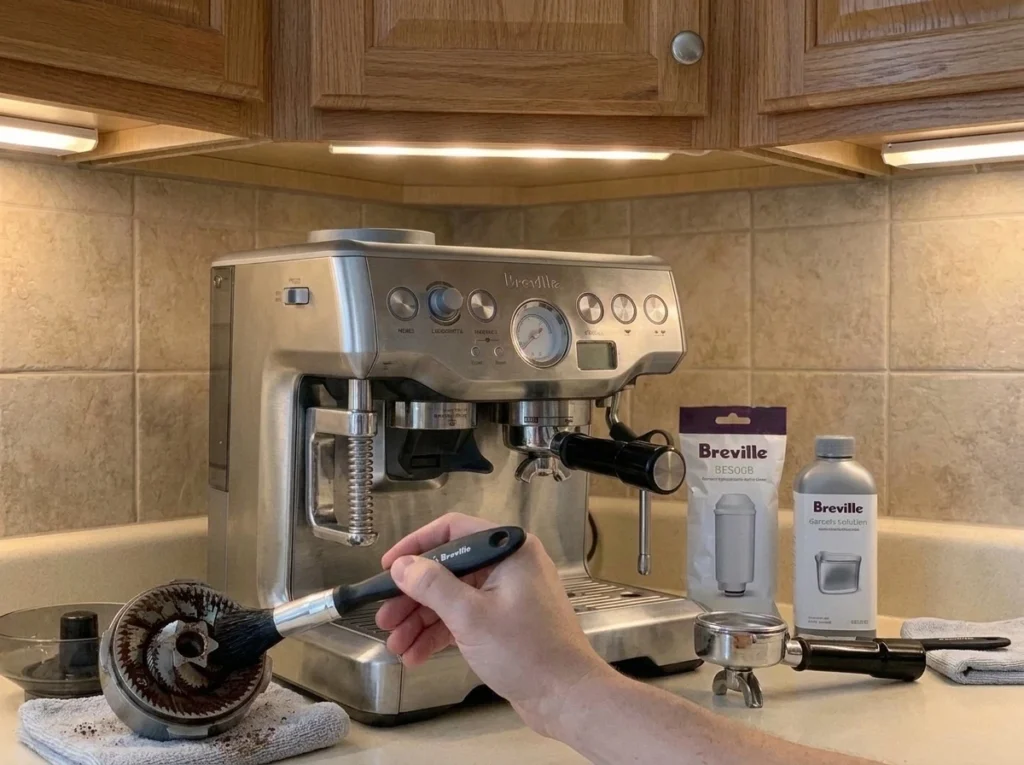
Breville’s own grinder conical-burr cleaning tutorial shows the same routine on video if you’d like to follow along.
Advanced Cleaning: Clearing a Blocked Grinder
You only need this if grounds are stuck between the burrs and the grinder outlet and a routine brush-out hasn’t fixed it. It removes the lower burr, so work slowly and note how parts come apart—reassembly order matters.
- Empty and run out the beans. Remove and empty the hopper, refit and lock it, and operate the grinder until no more grounds emerge. Switch the machine off, unplug it, and then remove the hopper again.
- Set the grind size to 1 (the finest setting).
- Loosen the nut only. Using a 10 mm socket, turn clockwise to loosen the nut—don’t remove the burr yet.
- Set the grind size to 25 (the coarsest setting).
- Unlock and remove the top burr.
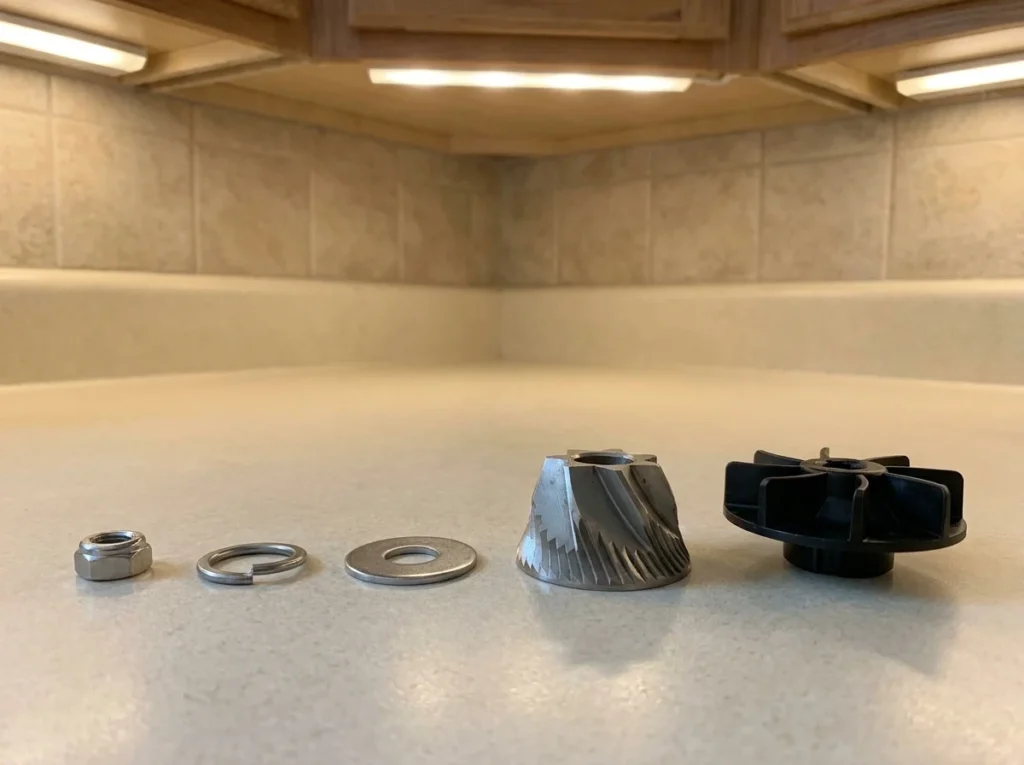
- Remove the nut, spring washer, and flat washer, then carefully lift out the lower burr.
- Remove the grind fan and washers with long-nose pliers (they come out in the order: grind fan, metal washer, felt washer).
- Unblock the outlet chute with the brush or a pipe cleaner, then remove the tamp cover and brush the chute clean before refitting the cover.
- Rebuild the stack with the pliers in reverse order: felt washer, metal washer, grind fan.
- Refit the lower burr, aligning its drive pin with the cavity, then add the flat washer and spring washer.
- Tighten the nut by turning the socket counter-clockwise.
- Refit and lock the top burr, then set the grind size back to 16 and refit and lock the hopper.
| Reassembly checklist Washers go back in reverse (felt, metal, grind fan). The lower burr’s drive pin must seat in its cavity. The nut loosens clockwise but tightens counter-clockwise. Return the grind size to 16 so your dial-in isn’t thrown off. |
| When to stop and call Breville If the nut, burr or grind fan will not move with moderate pressure, stop rather than forcing it. Contact Breville support if the grinder repeatedly blocks, produces metal-on-metal sounds, has damaged parts or still does not operate after correct cleaning and reassembly. |
While You’re There: Clean the Tamp System
Because the Impress grinds, doses, and tamps in one place, grounds collect around the tamp too. Remove the tamp cover and brush the tamp face and cradle. Push the tamp lever down and hold it while you brush away residue, then release the lever slowly and make sure the brush is clear before it returns. Refit the cover. A clean tamp face is what keeps the puck level and the dose reading honest.
How Often Should You Clean the Grinder?
There’s no grinder maintenance light and no fixed manufacturer interval, so go by habit and by signs. The routine below is a sensible baseline.
| Task | When to do it |
| Purge the grinder | Before the first coffee each day |
| Brush the burrs and chute | Regularly—or when grinding slows, clumps, or the dose drifts |
| Advanced (clog) clean | Only when the grinder is blocked |
| Wipe the hopper | When you change beans |
Signs it’s time for a brush-out: the grinder sounds like it’s working harder, shots pull faster than they used to at the same setting, the dose comes up short, or the coffee tastes flat and stale even with fresh beans.
Grinder Not Working? Quick Troubleshooting
Some apparent grinder faults are caused by a blocked chute, an incorrectly locked hopper, an improperly seated portafilter or a tamp lever that has not returned to its home position. Match the symptom below before assuming a fault.
- Grinding takes a very long time: the chute is likely blocked—clean it as above.
- Grinder times out mid-dose: the grind is very fine and clogging—clean the burrs and chute.
- Won’t grind at all: check for beans, make sure the hopper is locked, seat the portafilter fully in the cradle, raise the tamp lever to its home position, and clear any coffee build-up stopping the portafilter from seating.
For faults beyond the grinder—lights, pressure, steam, or dose problems—our Barista Express Impress troubleshooting guide walks through the rest.
The Bottom Line
Cleaning the Barista Express Impress grinder is mostly a quick, brush-only job: run out the beans, lift the top burr, and clear the burrs and chute, keeping everything dry and minding the sharp edges. Save the socket-and-pliers strip-down for an actual clog, and when you do it, reassemble in the right order and reset the grind to 16. Purge before your first shot, act on the early signs of a dirty grinder, and the machine will keep dosing and grinding the way it did new.
Frequently Asked Questions
Empty the hopper and run the grinder out, then remove the hopper and the top burr and brush both burrs and the grinds chute with the supplied cleaning brush. Keep everything dry and refit the parts. That routine brush-out is all most users need.
Purge the grinder before the first coffee each day, and brush the burrs regularly—or whenever grinding slows, the grind clumps, the dose drifts, or the coffee tastes stale. There’s no grinder maintenance light and no fixed manufacturer interval, so go by these signs.
For a routine clean, just the supplied brush. You only need tools—a 10 mm socket and long-nose pliers—for the advanced clean, which removes the lower burr to clear a blockage.
No. Clean the burrs and chute with a brush and keep them dry, and don’t put grinder parts in the dishwasher. Water plus coffee fines forms a paste and can rust the burrs.
Unlock and remove the hopper, then turn the top burr to unlock and lift it out—that’s enough for routine cleaning. The advanced clean goes further, using a socket and pliers to remove the nut, washers, grind fan, and lower burr; reassemble in reverse order and reset the grind size to 16.
Usually a very fine grind clogging the burrs or a blocked chute. Brush the burrs and clear the chute; if grounds are stuck at the outlet, do the advanced clean.
Check the basics: beans in the hopper, hopper locked in place, portafilter fully seated in the cradle, the tamp lever raised to its home position, and no coffee build-up blocking the portafilter from seating.
Cleaning removes residue so the burrs cut consistently. Adjusting the upper burr changes the grind range for dialing in tricky beans and is separate from cleaning—don’t change it as part of a clean.

Share your coffee experience
Have you tried this product? Add a thoughtful review or ask a question.